Logo NoiseCapture NoiseCapture calibration


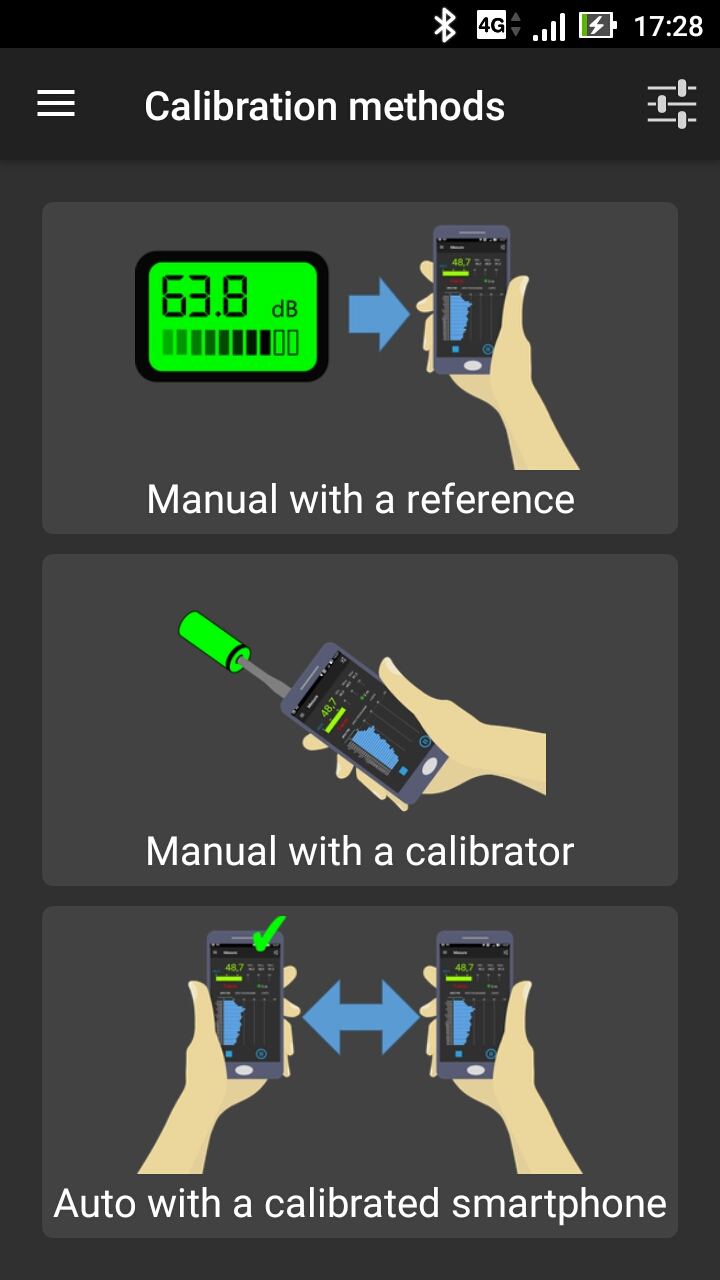
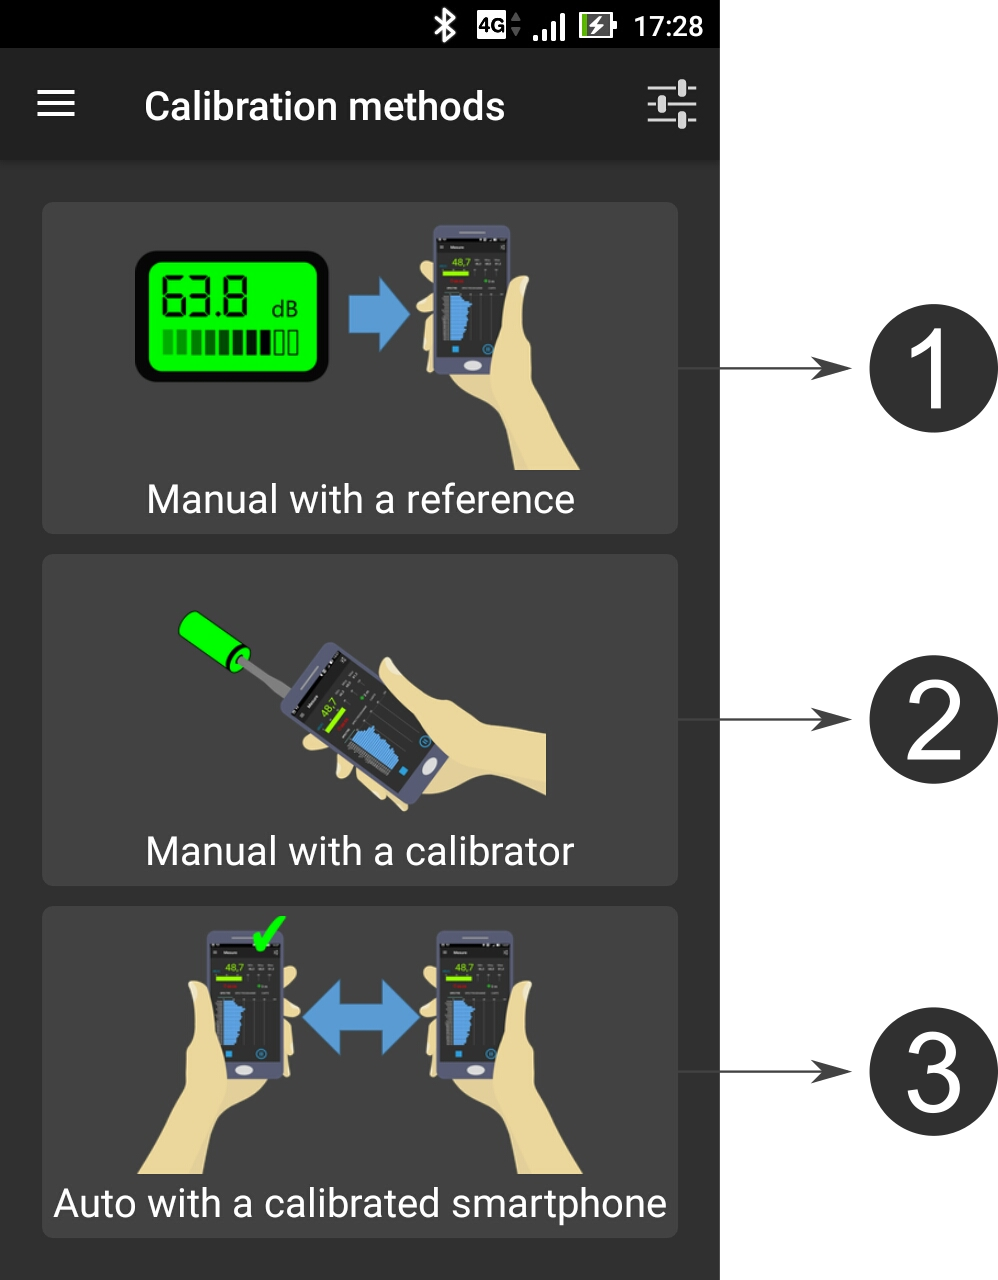
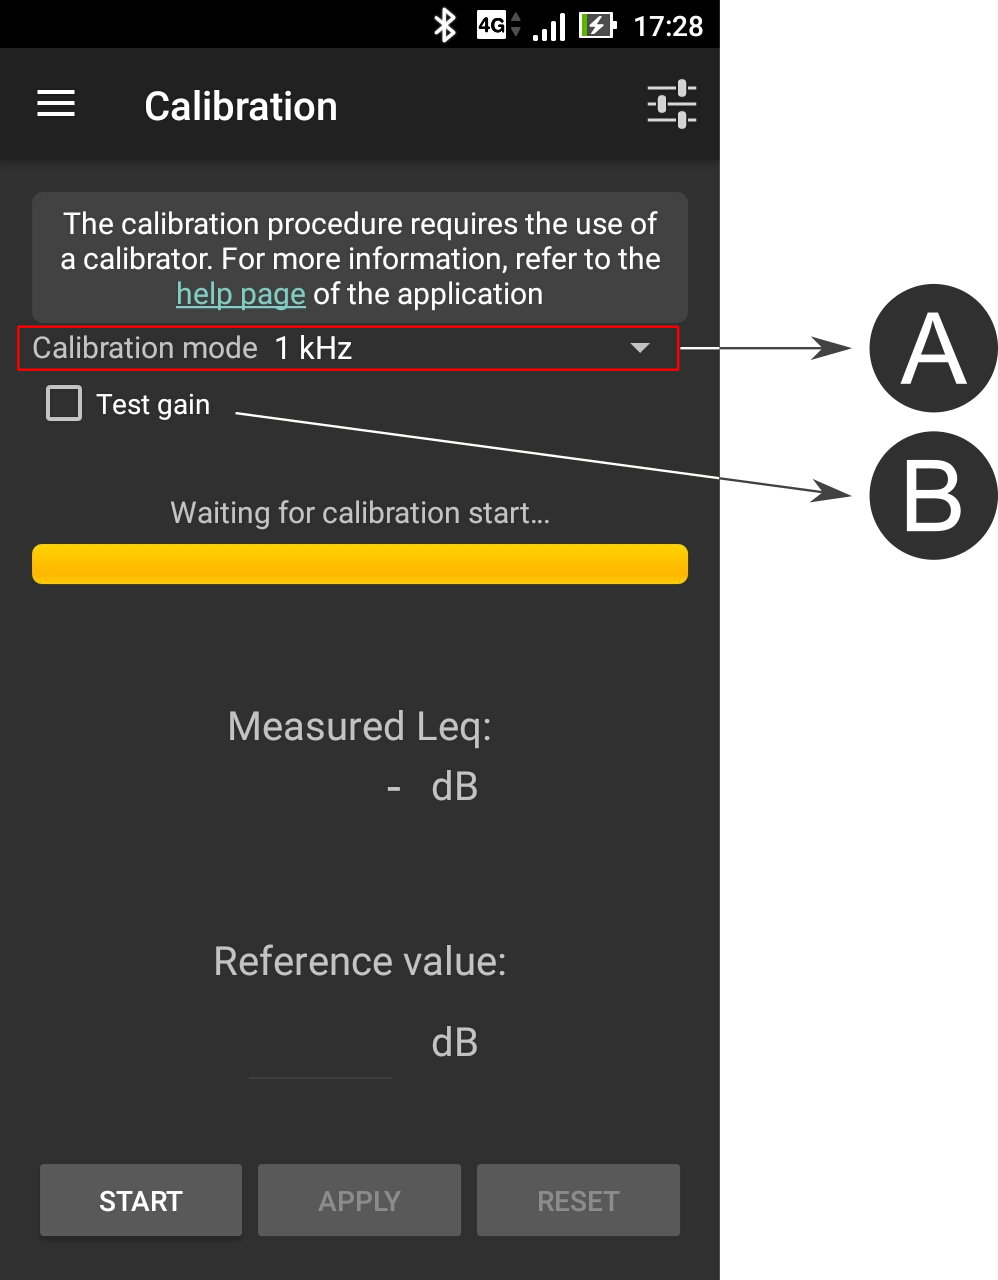
On the Calibration menu item, users have the opportunity to calibrate their smartphone.

The smartphone calibration is a crucial and recommanded step. Without calibration, you can be sure that the measured data will be wrong!

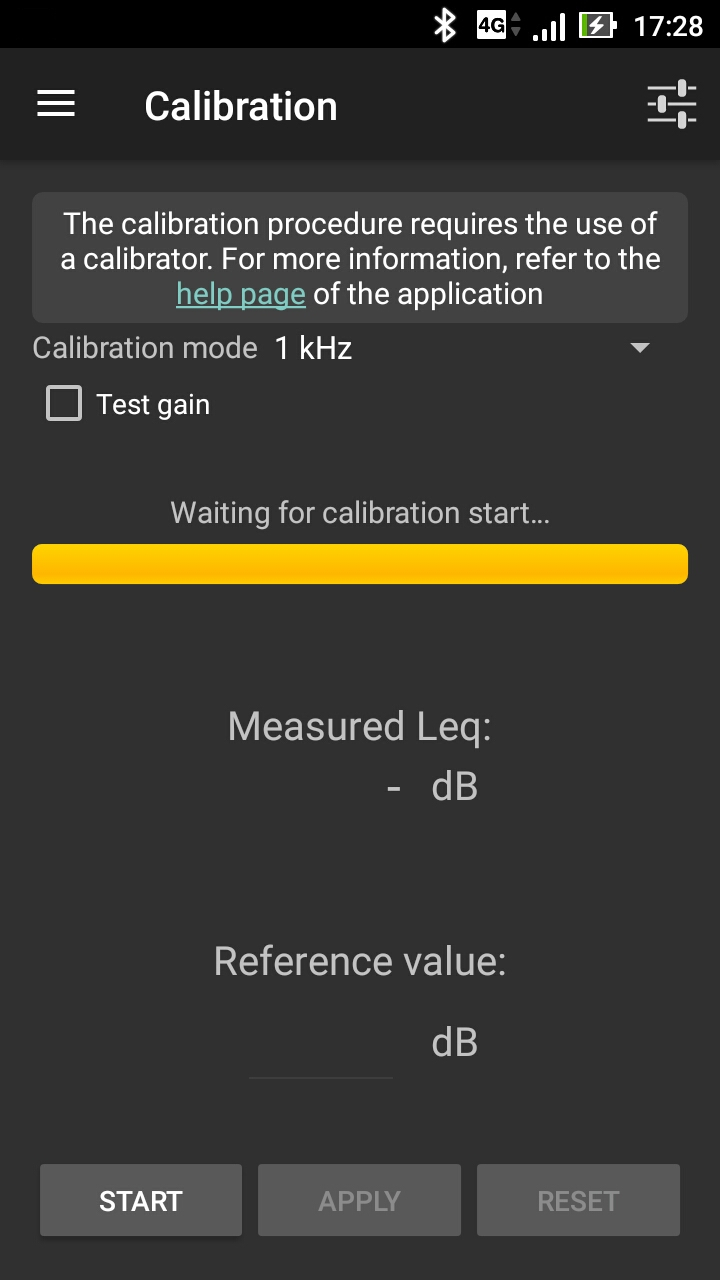
The methodology is based on the knowledge of a Reference value for the equivalent noise level Leq (in dB, not in dB(A)) for a given duration, from a reference device (an acoustic calibrator, a calibrated smartphone, a sound level meter). Depending on the calibration method, the calibration can be performed for a given frequency band or for the full range (global value). This Reference value is then compared to the Measured Leq (in dB) using the smartphone. The difference between these two values gives a correction factor (i.e. the signal gain) that will be applied to the input signal.

Warning:

  • The correction factor is applied for the whole signal. Multi-frequency calibration is not possible for now.
  • The calibration is carried out with dB values, not dB(A).


Calibration menu


Several calibration methods are possible:

  1. Manual calibration from a reference device
  2. Manual calibration from a calibrator device
  3. Automatic calibration from a calibrated smartphone

Calibration from a reference device (1) or a calibrator (2)


Performing the calibration

Manual calibration

  1. In the 'Calibration mode' list ("A" on the illustration), choose the frequency on which you want perform the calibration. If you calibrate from a reference device (e. g. sound level meter), you can also choose 'Global' from the list to calibrate over the entire measurement spectrum. In the latter case, remember to configure the reference device to perform a measurement in the same frequency band as your smartphone.
  2. Press the START button.
    • Before calibration starts, you have a warm-up time that can help you to prepare your calibration (prepare to turn on the reference device, if necessary).
    • Then, the calibration measurement starts for a given duration. For a better accuracy, the measurement duration should be the same both for the smartphone and for the reference device.
  3. Once the measurement is done, enter the Reference value (from the reference device) in the edit box and press the APPLY button.
  4. If you do not want to apply the correction factor, you can press the RESET button to perform a new calibration or you can leave the Calibration activity.

Testing the calibration

  1. Once a correction factor is applied, you can test the calibration by checking the box 'Test gain' ("B" on the illustration).
  2. Press the START button for performing a new measurement and turn on (if necessary) the calibrator.
  3. At the end of the measurement, the Measured Leq should be equal or quite similar to the reference device.
  4. Given the procedure and equipment involved, you may consider acceptable a difference up to 0.5dB between the two values. If the difference is not acceptable, restart the Calibration procedure. After several attempts, if you can not calibrate your smartphone phone with a difference of less than 0.5dB, you can restart with an error of 1dB.

When using a 'Global' value for the calibration, make sure that the Reference value will be obtained using the same frequency range that your smartphone.

The 'Calibration warm-up time' and the 'Calibration duration' can be modified in the Settings.

During calibration, the smartphone and the reference device must be used in a similar way.

Automatic calibration from a calibrated smartphone (3)


In this method, a smartphone already calibrated with NoiseCapture, can calibrate one or more smartphones. On the side of the microphones to be calibrated, the procedure is fully automatic. The entire system is controlled by the reference smartphone.

Performing the calibration

  1. The reference smartphone must in "transmitter" mode.
  2. The smartphones to be calibrated must be in "receiver" mode.
  3. On the reference smartphone:
    1. Choose the source signal:
      1. "Pink noise" : in this case, the smartphone generates a reference signal. It is necessary to use a sound source connected wirelessly with the reference smartphone, the source being at equal distance from all smartphones;
      2. "Ambient noise" : Environmental noise is used for calibration. The sound level must be sufficiently high and the sound field must be relatively "diffuse".
    2. Press START; the rest of the procedure is automatic. If needed, you can cancel the current calibration with the CANCEL button.

Selection of the Transmitter (1) or Receiver (2) mode

Auto Calibration menu

Selection of the Pink (1) or Ambient (2) noise source

Noise type